Why Make This Recipe
Oreo No-Bake Cheesecake Cups are the perfect dessert for any occasion. They are easy to make, require no baking, and the combination of creamy cheesecake and crunchy Oreo cookies is simply irresistible. These individual cups are not just delicious; they are also fun and visually appealing, making them great for parties, family gatherings, or a sweet treat after dinner. Plus, they come together in no time, letting you enjoy more moments with friends and family.
What’s Cooking in This Article
Table of Contents
How to Make Oreo No-Bake Cheesecake Cups
Ingredients:
- 1 8 oz block of cream cheese, softened
- 1 8 oz. Cool Whip or whipped topping
- 2/3 cup powdered sugar
- 1 tsp vanilla
- 24-26 Oreo cookies (more as desired)
Directions:
- Place the Oreos in a plastic bag and seal it. Using a rolling pin or a sturdy wooden spoon, crush the Oreos into fine crumbs.
- Spoon 1 1/2 to 2 tablespoons of the crushed Oreos into the bottom of 6 small dessert dishes. Make sure the dishes are at least 3/4 cup to 1 cup in size. Set them aside.
- In a bowl, use a hand or standing mixer to whip the softened cream cheese and powdered sugar together until creamy and smooth.
- Add in the vanilla and mix well to combine.
- Gently fold in the Cool Whip until fully incorporated. Then, fold in the remaining crushed Oreos.
- Evenly divide the cheesecake filling among the dessert dishes and gently press it onto the layer of crushed Oreos.
- Chill the cups in the refrigerator for about 1 hour or until you are ready to serve them.
- Before serving, top each cup with whipped cream and more crushed Oreos if desired. Enjoy!
How to Serve Oreo No-Bake Cheesecake Cups
Serve these delightful cheesecake cups chilled straight from the refrigerator. You can add a dollop of whipped cream and a sprinkle of crushed Oreos on top for an extra touch. If you’re hosting a party or a gathering, consider placing them on a decorative tray for an appealing presentation.
How to Store Oreo No-Bake Cheesecake Cups
Keep the Oreo No-Bake Cheesecake Cups covered in the refrigerator. They can be stored for up to 3 days. Make sure they are in an airtight container or wrapped to maintain freshness. If you need to store the cups for longer, consider making the cheesecake filling and crushed Oreos separately and combine them just before serving.
Tips to Make Oreo No-Bake Cheesecake Cups
- Ensure the cream cheese is at room temperature for easier mixing and a smoother texture.
- For a more intense Oreo flavor, add more crushed cookies to the filling.
- Experiment with different flavored whipped toppings, such as vanilla or chocolate, for a unique twist.
- If you want an extra layer, you can add a layer of chocolate sauce between the Oreo crust and the cheesecake filling.
Variation
You can customize the Oreo No-Bake Cheesecake Cups by using different types of Oreos, like mint or peanut butter flavored. This adds a unique spin on the classic recipe and caters to different taste preferences.
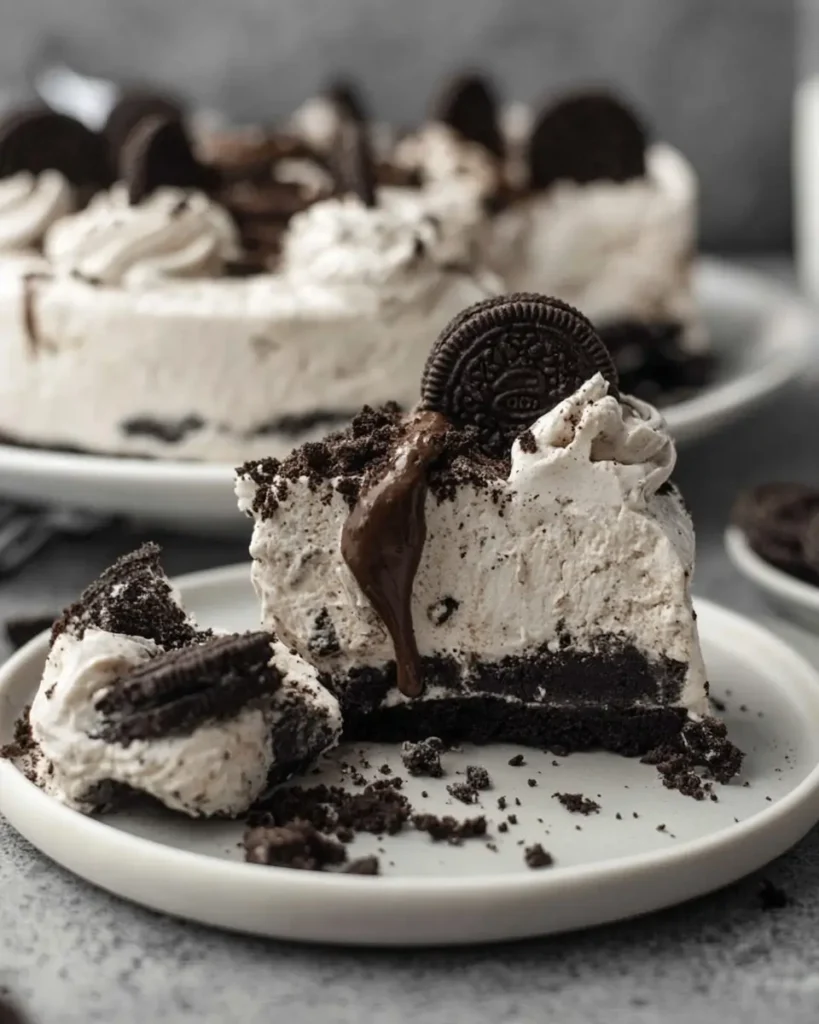
Enjoy the rich and creamy flavor of Oreo cheesecake, a decadent dessert packed with crunchy chocolate cookie layers and smooth cheesecake filling perfect for every occasion.
For more delicious recipes, try this fresh fermented cabbage salad idea or sip on a refreshing frozen paloma cocktail recipe. You can also explore these creamy no-bake berry yogurt cheesecakes for another easy dessert option.
FAQs
Can I make these cheesecake cups ahead of time?
Yes, you can make them a day ahead. Just keep them covered in the refrigerator until you are ready to serve.
Can I freeze Oreo No-Bake Cheesecake Cups?
It is not recommended to freeze the cups, as the texture may change once thawed. It’s best to store them in the fridge.
What can I use instead of Cool Whip?
You can use homemade whipped cream as a substitute for Cool Whip. Just be sure to whip the cream until soft peaks form before folding it into the mixture.
Want more recipes? Follow me on Pinterest and X!
PrintOreo No-Bake Cheesecake Cups

Delicious individual cheesecake cups with creamy filling and crunchy Oreo crust, perfect for any occasion.
- Prep Time: 15 minutes
- Cook Time: 0 minutes
- Total Time: 60 minutes
- Yield: 6 servings 1x
- Category: Dessert
- Method: No-Bake
- Cuisine: American
- Diet: Vegetarian
Ingredients
- 1 8 oz block of cream cheese, softened
- 1 8 oz. Cool Whip or whipped topping
- 2/3 cup powdered sugar
- 1 tsp vanilla
- 24–26 Oreo cookies (more as desired)
Instructions
- Place the Oreos in a plastic bag and seal it. Using a rolling pin or a sturdy wooden spoon, crush the Oreos into fine crumbs.
- Spoon 1 1/2 to 2 tablespoons of the crushed Oreos into the bottom of 6 small dessert dishes. Set them aside.
- In a bowl, use a hand or standing mixer to whip the softened cream cheese and powdered sugar together until creamy and smooth.
- Add in the vanilla and mix well to combine.
- Gently fold in the Cool Whip until fully incorporated. Then, fold in the remaining crushed Oreos.
- Evenly divide the cheesecake filling among the dessert dishes and gently press it onto the layer of crushed Oreos.
- Chill the cups in the refrigerator for about 60 minutes or until ready to serve.
- Before serving, top each cup with whipped cream and more crushed Oreos if desired. Enjoy!
Notes
Store covered in the refrigerator for up to 3 days. For a different twist, use flavored whipped toppings or different types of Oreos.
Nutrition
- Serving Size: 1 cup
- Calories: 320
- Sugar: 22g
- Sodium: 220mg
- Fat: 18g
- Saturated Fat: 8g
- Unsaturated Fat: 8g
- Trans Fat: 0g
- Carbohydrates: 34g
- Fiber: 1g
- Protein: 4g
- Cholesterol: 30mg